How to Add an SSD to a PC: Easy Step-by-Step Guide for Beginners
Are you ready to make your PC run faster? Adding a solid-state drive (SSD) can change how you use your computer. But, you might wonder how to start. Our guide will show you how to add an SSD to your PC, making your computing experience better.
Key Takeaways
- SSD upgrades can significantly boost boot times and application performance for users of all skill levels.
- The SSD installation process requires only a few basic tools, making it accessible for beginners.
- Proper static electricity precautions and careful handling of the SSD ensure a successful and safe installation.
- Detailed step-by-step instructions guide you through the entire process, from preparing your workspace to connecting cables and powering on.
- Optimizing SSD performance with features like Momentum Cache can unlock even greater speed and efficiency.
Introduction to Adding an SSD to Your PC
Adding a solid state drive (SSD) to your desktop can greatly improve its speed. SSDs make your computer start up faster, load apps quicker, and work more smoothly. This guide will help you install an SSD in your PC, boosting its performance.
SSDs are now a top choice for their speed and reliability. They don’t have moving parts like HDDs do. Instead, they use flash memory for data storage. This means they can access data almost instantly, making your computer run much faster.
SSDs are also more energy-efficient than HDDs. They use about 2 to 3 watts of power, while HDDs use 6 to 7 watts. This can help your laptop battery last longer. SSDs also run cooler, which can protect other parts of your computer from overheating.
Upgrading to an SSD can also make your computer more reliable. SSDs are less likely to break from drops or shocks because they have no moving parts. They also use advanced technology to protect your data, reducing the chance of losing it.
This guide will walk you through installing an SSD in your PC. We’ll cover choosing the right drive and moving your data safely. By the end, you’ll know how to make your computer run faster and smoother with SSD technology.
| Metric | SSD | HDD |
|---|---|---|
| Average Power Draw | 2-3 watts | 6-7 watts |
| Data Access Speed | Near-simultaneous | Slower |
| Durability | Highly resistant to shocks and vibrations | More prone to physical damage |
| Heat Generation | Lower due to no moving parts | Higher due to mechanical components |
Benefits of Upgrading to an SSD
Switching from a traditional hard disk drive (HDD) to a solid-state drive (SSD) can greatly boost your computer’s performance. SSDs make your system start up much faster. They also make apps and programs load and run smoothly, giving you a better experience.
Faster Boot Times
SSDs cut boot times by a lot. They can make your computer start up up to 10 times quicker than HDDs. This is great for people who restart their computers often during the day.
Improved Application Performance
SSDs also make apps run faster. They have better data access times, so apps load and run quicker. This means a smoother and more efficient experience, especially with big software or files.
SSDs are also more reliable and durable than HDDs. They don’t have moving parts, so they’re less likely to break or fail. This means your computer and its parts can last longer.
| Metric | HDD | SSD |
|---|---|---|
| Boot Time | 60-90 seconds | 10-15 seconds |
| Application Load Time | 10-30 seconds | 2-5 seconds |
| Data Transfer Speed | 50-120 MB/s | 550 MB/s (SATA), 64,000 MB/s (NVMe) |
| Energy Efficiency | Higher power consumption | Lower power consumption |
Upgrading to an SSD brings big performance boosts. You’ll see faster boot times and quicker app loading. This means a smoother and more productive experience overall.

Types of SSDs: M.2 vs. SATA
Upgrading your desktop PC with a solid state drive (SSD) means choosing between M.2 and SATA types. Knowing the differences helps you pick the right one for your system’s needs.
M.2 SSDs are small and fast, connecting directly to the motherboard. They offer speeds up to 20Gbps, which is faster than SATA SSDs. M.2 SSDs vary in size to fit different motherboards.
SATA SSDs use the common SATA connectors. They’re a budget-friendly choice. Though slower than M.2, SATA SSDs still offer good performance, with speeds around 540-600 MB/s.
When picking between M.2 and SATA SSDs, think about these things:
- Your system’s available storage bays or M.2 slots
- The performance needs of your applications and workloads
- The compatibility of your motherboard with different SSD interface types
Understanding M.2 and SATA SSDs helps you choose the best for your desktop PC’s storage needs.
Required Tools and Supplies
Upgrading your desktop PC with a speedy Crucial SSD boosts its performance. Before starting, you’ll need some key tools and supplies. First, get the SSD itself. A Crucial SSD is a great choice for its reliable performance and support.
You’ll also need screwdrivers. The type depends on your computer’s make and model. Check your owner’s manual for the right tools.
Having the owner’s manual ready can help a lot. It gives step-by-step instructions for installing the SSD in your desktop PC. This makes the installation smooth and successful.
Crucial SSD
The Crucial SSD is a top pick for upgrading your system. These drives are much faster than traditional hard disk drives (HDDs). They’re also reliable and durable, making them a smart choice for your PC.
Screwdrivers
You’ll need screwdrivers to get into your desktop PC and install the SSD. The right screwdrivers depend on your computer’s type. Always check your owner’s manual for the correct tools. Having the right screwdrivers for PC makes installation easy.
Owner’s Manual
Your computer’s owner’s manual is crucial for installing an SSD. It gives specific steps for your PC, ensuring a smooth install. Keep it handy during the process for any needed info or guidance.
How to Install an SSD Safely
Upgrading your computer with a solid-state drive (SSD) requires careful steps for a safe installation. Static electricity is a big risk for sensitive parts inside your computer. So, it’s key to take steps to prevent this before you start.
Static Electricity Precautions
First, ground yourself by touching a metal part of your computer that isn’t painted. This helps get rid of static electricity and keeps it from reaching the SSD. Also, don’t touch the SSD’s connectors to avoid any static shocks.
Handling the SSD Carefully
Be careful with the SSD. Hold it by the edges only, making sure not to press on the circuit board or connectors. This keeps the SSD safe during installation.
By taking these steps, you can make sure your SSD installation goes smoothly and without damage. This protects your investment and keeps your computer running well for a long time.
“Proper precautions against static electricity and careful handling of the SSD are essential for a successful and safe installation.”
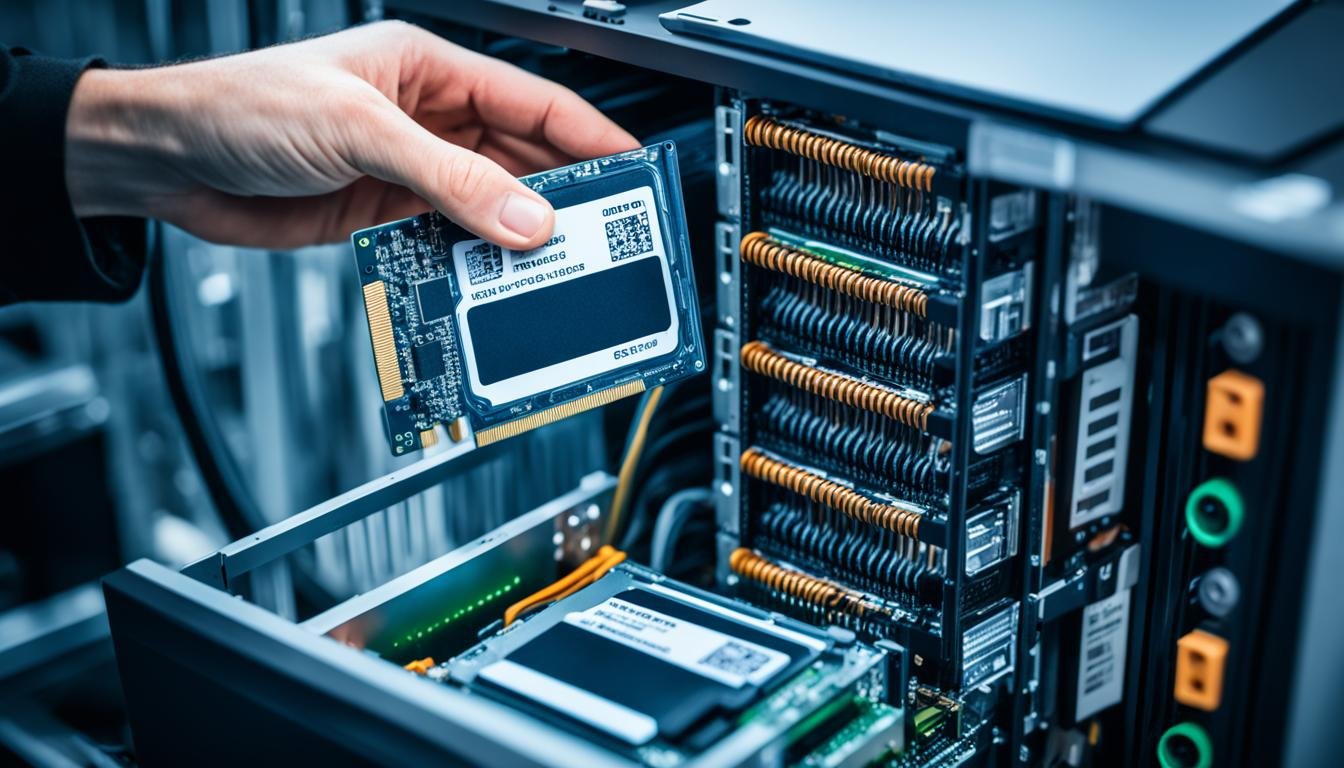
Step-by-Step Instructions for Desktop SSD Installation
Upgrading your desktop’s storage with a solid-state drive (SSD) boosts its performance. First, prepare your workspace and collect the needed tools. Power down your desktop and unplug the power cable. Then, press and hold the power button for 5 seconds to clear any leftover electricity.
Prepare Your Workspace
Choose a clean, static-free area for the SSD installation. Make sure the surface is free of dust or debris that could damage your computer’s parts.
Power Down and Open the Case
Use your owner’s manual to safely open your desktop’s case. This lets you access the internal parts, including the storage bay for the new SSD.
Locate the Storage Bay
Find the storage bay in your desktop, noting its size specs. If your SSD doesn’t fit, you might need an adapter for a proper fit.
With your workspace ready and the case open, you’re set to start the desktop ssd installation. Handle the SSD carefully and follow safety steps to prevent static electricity. Next, install the SSD securely in its bay.
how to add an ssd to a pc
Adding a solid state drive (SSD) to your desktop PC can make it run much faster. This guide will show you how to install an SSD safely and efficiently. You can replace an old hard drive or add more storage.
Prepare Your Workspace
Make sure your workspace is clean and free from static. Use an ESD wrist strap to avoid static electricity damage. You’ll need a screwdriver set and your new SSD for the job.
Locate the Storage Bay
Turn off your PC and open the case. Find where your hard drive is kept. This is usually at the front or side of the case.
Install the New SSD
- Take out the old hard drive and remove any cables.
- Put the new SSD in the storage bay and press it in place.
- Connect the SATA data and power cables to the SSD.
- Use screws to secure the SSD in the bay.
Migrate Your Data
Use disk cloning software, like EaseUS ToDo Backup, to move your files to the SSD. This might take a few hours, so be patient.
After cloning, turn on your PC. It should now run faster from the new SSD.
These steps make adding an SSD to your PC easy. You’ll get faster boot times and better app performance. Always handle the SSD carefully to avoid static damage during installation.
Connecting Cables and Powering On
After installing the SSD, connect the ssd cables to power it up. First, link the sata power cable from your computer’s power supply to the SSD. This cable gives the drive the power it needs.
Then, connect the sata data cable from the SSD to a SATA port on your motherboard. If you’re unsure where to find the SATA port, check your motherboard’s manual. Make sure the cables are securely connected for a steady data transfer.
With the ssd cables in place, turn on your computer. You’ll need to set up the SSD by updating BIOS settings, setting boot priority, and moving your data. Soon, your SSD will be ready to show off its speed.
Data Migration and Cloning Options
Upgrading to a solid-state drive (SSD)? You’ll want to move all your data from your old hard drive (HDD) to the new SSD. You can use data migration or cloning software for this. Many SSD makers, like Crucial, offer free tools to help.
Acronis True Image is a great choice, offering a free 30-day trial for cloning disks. It makes moving everything over easy, so you don’t have to set up each program again.
Or, you could start fresh with a clean install of your OS on the SSD. Then, move over your files and programs manually. This is good if you want a clean start or if cloning has issues.
Make sure the SSD is as big or bigger than your HDD to avoid problems during the move. Cloning can take a while, depending on your drives and data size.
| Drive Type | Cloning Duration |
|---|---|
| 1TB SATA SSD | ~17 minutes |
| 2x 1TB NVMe SSDs | ~10 minutes |
| 5x 1TB M.2 SSDs | ~8 minutes |
| 2x 1TB SATA HDDs | ~30 minutes |
Cloning to a different computer might be tricky due to hardware differences. You might run into issues with Windows licensing, drivers, and hardware. If you’re moving the SSD to another computer, look into other options. Tools like Sysprep, Driver Booster, or Microsoft Deployment Toolkit (MDT) can help with imaging and deployment.
Optimizing SSD Performance
To make the most of your solid-state drive (SSD), follow a few easy steps. First, download and install the Crucial Storage Executive software. This includes a Momentum Cache feature that can speed up your SSD by up to 10 times. This caching technology speeds up data you use a lot, giving you a big boost in performance.
Make sure your SSD isn’t fragmented by using a disk defragmentation tool. This isn’t needed as often as with traditional hard drives, but it keeps your SSD running well. SSDs don’t get fragmented like hard drives do, but some defragmentation is still good.
- Enable Momentum Cache to improve SSD speed by up to 10 times
- Run disk defragmentation utility to maintain SSD performance
By doing these things, you’ll make your SSD system more responsive and efficient. Your data will be quicker to get to and your apps will run better. Keeping your SSD in top shape means it will keep giving you fast performance.
| Optimization Technique | Performance Benefit |
|---|---|
| Enable Momentum Cache | Up to 10x speed boost |
| Run Disk Defragmentation | Maintains optimal performance |
“Maximizing SSD performance is key to getting the most from your system. Using Momentum Cache and regular defragmentation keeps your drive running smoothly.”
Troubleshooting Common Issues
Adding an SSD to your PC is usually easy, but you might face some problems. Knowing these issues and how to fix them can help you use your solid-state drive smoothly. This way, you can enjoy the speed boost your new SSD offers.
One common issue is when you can’t read or write files to the drive. This might mean the drive is read-only or your computer is running slow. Sometimes, you might even get a “blue screen of death” or “black screen of death,” stopping your system from starting.
To fix these problems, check the drive’s health with SMART tools. Also, keep your SSD and motherboard BIOS updated to avoid issues like cursor freezing or system crashes.
If you can’t solve the problem yourself, get help from the SSD maker’s support or a tech expert. They can give you detailed help. They’ll figure out if you need a new drive or if there are other issues with your hardware or software.
| Common SSD Issues | Potential Causes | Troubleshooting Steps |
|---|---|---|
| Slow Performance | – Fragmented files – Insufficient free space – Outdated firmware |
– Optimize SSD settings – Maintain 10-20% free space – Update SSD firmware |
| Booting Issues | – Improper cable connection – Incompatible BIOS settings – Faulty SSD |
– Check cable connections – Verify BIOS settings – Perform SSD diagnostics |
| Data Loss/Corruption | – Power surge – Unexpected shutdown – Physical damage |
– Use data recovery tools – Backup data regularly – Handle SSD with care |
Knowing how to handle common ssd troubleshooting issues can make your SSD work better and last longer. This ensures a smooth setup and use of your new storage solution.
“Proactive monitoring and maintenance of your SSD can prevent many common issues and ensure its optimal performance for years to come.”
Maintaining and Caring for Your SSD
SSDs are easier to maintain than traditional hard disk drives (HDDs). Still, taking a few steps can help your SSD last longer and work better. Proper ssd maintenance and ssd care are key to extending ssd lifespan.
Don’t expose your SSD to extreme temperatures, vibrations, or shocks. These can harm the inside parts. Keep your SSD in a cool, well-ventilated spot for best performance and life.
Make sure to update your SSD‘s firmware regularly. Updates often bring bug fixes and performance boosts. This keeps your drive reliable over time.
Watch how much you write to your SSD. Too many writes can wear it down. Here are some tips to help:
- Don’t store big files you don’t use often on your SSD. Use it mainly for your operating system, apps, and files you use a lot.
- Keep your SSD less than 75% full for best performance and life.
- Use tools like CCleaner to find and delete files you don’t need, freeing up space on your SSD.
With the right care, your new SSD will give your desktop PC years of fast, reliable storage. By following these simple ssd maintenance and ssd care tips, you can extend ssd lifespan and make the most of your investment.
Conclusion
Adding a solid state drive (SSD) to your desktop PC is a simple way to boost performance. This guide has shown how to install an SSD safely and make it work best for you. You’ll see faster boot times, quicker app loading, and smoother daily use.
Installing an SSD is easy, whether you’re replacing an old drive or adding more storage. SSDs make even old systems run better. They beat RAM or processor upgrades for tasks like office work, web browsing, and watching videos.
This guide is for everyday users wanting to make their old systems last longer. A 64 or 128 GB SSD for the OS and apps can make a big difference. It’s affordable, costing between $120 and $250. With this advice, you can easily add more storage, improve security, and make your system more responsive.


Leave a Reply